
This article will explain the steps required to build an offline depot for VCF 9.1.1 on Photon OS. New to 9.1.1 is the artifacts download option, which allows you to grab the OCI compliant images to allow you to build out an air-gapped VCF installation with ease compared to what was required in 9.1.
- VCF Comsumption plugins
- VCF-A automation extensions
- Supervisor Services
- vSphere Kuberentes Releases
- VCF Services
This new feature effectively deprecates my two articles on populating the offline depot with Supervisor and Regional Harbor artefacts.
As with 9.1, you require a depot ID, which you associate with the VCF Business Console to generate an activation code. This stops the abuse of download tokens and means each VCF installer or instance of an offline depot will require its own activation code. The full process is documented here.
Downloads
Head over to the Broadcom support site for VCF; under drivers and tools, grab the VCF download tool. Then head on over to the VMware Photon OS download site and grab the full ISO image for Photon 5. In my case, I already have an offline depot for version 9.1 and will be upgrading the tool and grabbing the latest binaries.
Create DNS records
I’ll be using the same DNS record that is already added to my MikroTik router for the new depot VM. This creates forward and reverse records.
/ip dns static
add address=10.166.101.1 comment="VCF Depot" name=depot01.aclab.uk type=A
Deploy Virtual Machine
The Virtual Machine and OS deployment is the same as in 9.1, please read the prior article for detailed steps.
Photon OS and Apache Setup
From the initial boot, you will be unable to SSH remotely, log in via the console from ESX and run the following commands. I recommend using a temporary basic password, as doing it via the VMware console is a pain.
useradd vcf -d /home/vcf -m
passwd -x 99999 vcf
passwd vcf
echo "vcf  ALL=(ALL)  NOPASSWD: ALL" >> /etc/sudoers.d/vcf
Once done, you will be able to SSH to the depot01 VM with vcf@depot01.aclab.uk and the temporary password. At this point, you can complete the setup with the following commands, which are much easier to paste over SSH.
The below commands complete the Apache setup, commands later in this article explain the VCF binary downloads.
## set secure password
passwd

## upload root certs, apache cert and download tool from my local machine
scp RootCA.pem vcf@depot01.aclab.uk:/home/vcf
scp Sub01.pem vcf@depot01.aclab.uk:/home/vcf
scp aclabuk_wildcard_microsoft_issued_public.pem vcf@depot01.aclab.uk:/home/vcf
scp aclabuk_wildcard_microsoft_issued_private.pem vcf@depot01.aclab.uk:/home/vcf
scp vcf-download-tool-9.1.0.0.25371089.tar.gz vcf@depot01.aclab.uk:/home/vcf

## setup public key auth for vcf user, replace the public key with your own
mkdir /home/vcf/.ssh -p
chmod 700 /home/vcf/.ssh
echo "ssh-ed25519 AAAAC3NzaC1lZDI1NTE5AAAAINHl20St5gyzVw/NXHpNcS8nUXwgrYHIvP/+f3ijtGAw" > /home/vcf/.ssh/authorized_keys
chmod 600 /home/vcf/.ssh/authorized_keys
sudo chown vcf:root /home/vcf -R

## secure sshd so only public key auth is possible
sudo su
cp /etc/ssh/sshd_config /etc/ssh/sshd_config.bak
sed -i 's/#PasswordAuthentication yes/PasswordAuthentication no/' /etc/ssh/sshd_config
echo "AuthenticationMethods publickey" >> /etc/ssh/sshd_config
systemctl daemon-reload
systemctl restart sshd

## if there are issues with openssl versions mismatches do the below
## look at "journalctl -f" when connecting via ssh
tdnf install openssh
systemctl daemon-reload
systemctl start sshd

## install packages, configure certificate trust
tdnf install httpd tar jq perl tree openssl-c_rehash vim --assumeyes
tdnf update --assumeyes
cd /home/vcf
cp RootCA.pem /etc/ssl/certs/
cp Sub01.pem /etc/ssl/certs/
rehash_ca_certificates.sh

## setup tls certs for apache
cp aclabuk_wildcard_microsoft_issued_public.pem /etc/httpd/conf/server.crt
cp aclabuk_wildcard_microsoft_issued_private.pem /etc/httpd/conf/server.key
chmod 0400 /etc/httpd/conf/server.key /etc/httpd/conf/server.crt
chown root:root /etc/httpd/conf/server.key /etc/httpd/conf/server.crt

## add htaccess password for vcf user for use with the COMP directory
htpasswd -c /etc/httpd/conf/.htpasswd vcf
chown apache /etc/httpd/conf/.htpasswd
chmod 0400 /etc/httpd/conf/.htpasswd

## backup and replace the apache configuration files with the ones provided in my github
## modify line 158 in httpd-ssl.conf to include your own hostname as required
cd /home/vcf
cp /etc/httpd/conf/httpd.conf /etc/httpd/conf/httpd.conf.bak
cp /etc/httpd/conf/extra/httpd-ssl.conf /etc/httpd/conf/extra/httpd-ssl.conf.bak
curl https://raw.githubusercontent.com/amayacitta/vcf9-lab/refs/heads/main/depot/httpd.conf -o /etc/httpd/conf/httpd.conf
curl https://raw.githubusercontent.com/amayacitta/vcf9-lab/refs/heads/main/depot/httpd-ssl.conf -o /etc/httpd/conf/extra/httpd-ssl.conf

## create dir and sort permissions
mkdir /var/www/html -p
chown apache:apache -R /var/www/html/
find /var/www/html -type d -exec chmod 0500 {} \;
find /var/www/html -type f -exec chmod 0400 {} \;
chmod 755 /var/www/
chmod 755 /var/www/html/

## validate apache config and start the service
httpd -t
systemctl enable httpd
systemctl start httpd
systemctl status httpd

## configure firewall to allow https
cp /etc/systemd/scripts/ip4save /etc/systemd/scripts/ip4save.bak
sed -i 's/COMMIT/-A INPUT -p tcp -m tcp --dport 443 -j ACCEPT/' /etc/systemd/scripts/ip4save
echo "COMMIT" >> /etc/systemd/scripts/ip4save
systemctl restart iptables
VCF Download Tool
The commands below configure the VCF download tool and grab the binaries, as well as set up the ESX patch store. With 9.1.1 for the UDMS patch store, we only need to run the commands below; we run a command which points to the same /var/www/html directory. This automatically creates the following symbolic link in the file system.

## copy the new download tool binary from my mac into the offline depot
scp vcf-download-tool-9.1.1.0.25713929.tar.gz vcf@depot01.aclab.uk:~

## ssh to the offline depot
ssh vcf@depot01.aclab.uk

## tidy up the prior 9.1 install
rm vcf-download-tool* -rf

## install the download tool and generate a depot id
## follow the instructions shown in the shell to generate an activation code
mkdir vcf-download-tool
tar -xvf vcf-download-tool-9.1.1.0.25713929.tar.gz -C vcf-download-tool
cd vcf-download-tool/bin
./vcf-download-tool configuration generate --software-depot-id

## create file with the activation code generated in the vcf business console
echo "your broadcom activation code" > /home/vcf/activation-code.txt

## filter and confirm the esx patch store will only download 9.1
./vcf-download-tool esx configuration -D=embeddedEsx-6.7-INTL
./vcf-download-tool esx configuration -D=embeddedEsx-8.0-INTL
./vcf-download-tool esx configuration -D=embeddedEsx-7.0-INTL
./vcf-download-tool esx configuration -D=embeddedEsx-9.0-INTL
./vcf-download-tool esx configuration -D=esxio-8.0-INTL
./vcf-download-tool esx configuration -D=esxio-9.0-INTL
./vcf-download-tool esx configuration -G

## download the esx patch store filtered to only the latest version
./vcf-download-tool esx download --depot-download-activation-code-file /home/vcf/activation-code.txt --ceip=ENABLE --depot-store /var/www/html

## download all installation binaries for the latest release
./vcf-download-tool binaries download --sku VCF --latest --vcf-version 9.1.1 --depot-download-activation-code-file /home/vcf/activation-code.txt --type INSTALL --depot-store /var/www/html

## download all upgrade binaries (if needed)
./vcf-download-tool binaries download --sku VCF --vcf-version 9.1.1 --latest --depot-download-activation-code-file /home/vcf/activation-code.txt --type UPGRADE --depot-store /var/www/html

## download oci artifacts for the supervisor and regional supervisor
./vcf-download-tool artifacts download --depot-download-activation-code-file /home/vcf/activation-code.txt --vcf-version=9.1.1 --depot-store /var/www/html

## when running these commands as root perform the following to fix permissions
chown apache:apache -R /var/www/html/
find /var/www/html -type d -exec chmod 0500 {} \;
find /var/www/html -type f -exec chmod 0400 {} \;
chmod 755 /var/www/
chmod 755 /var/www/html/
The ESX patch downloads will take a while. When complete, you will see a summary.
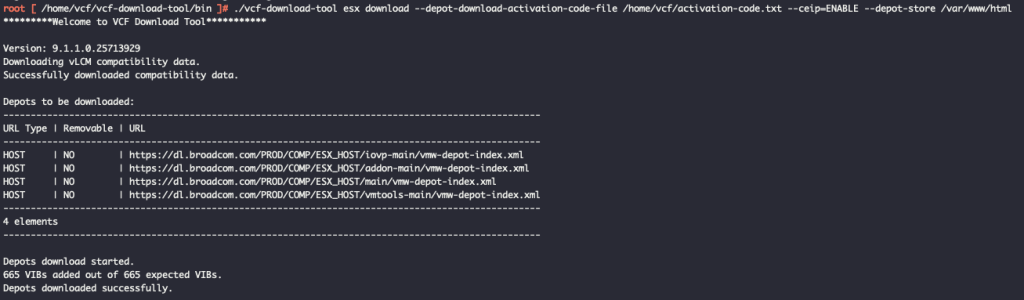
Here is a summary for install binaries.
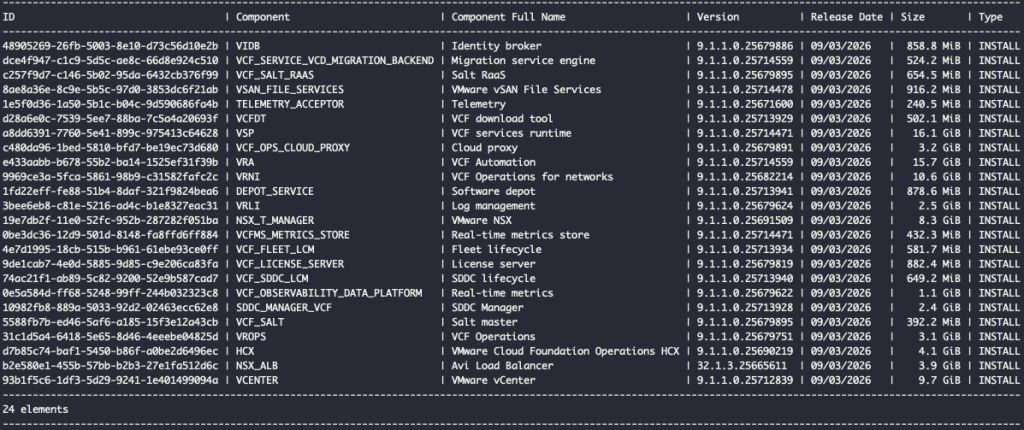
Upgrade binaries.
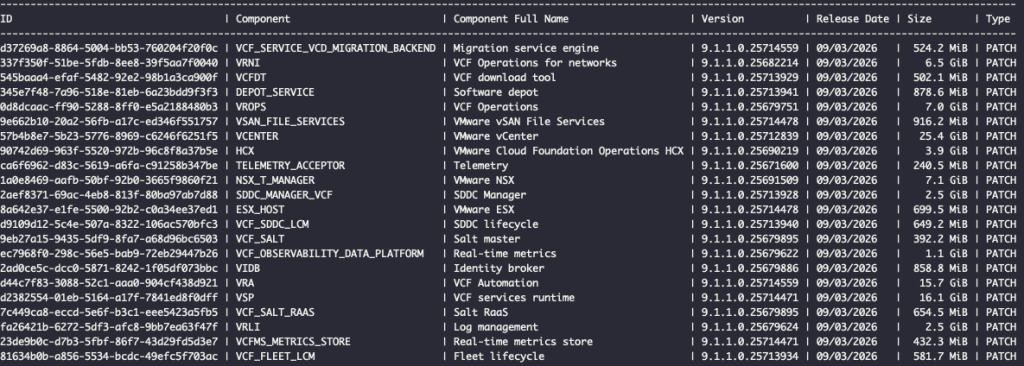
OCI Artefacts.
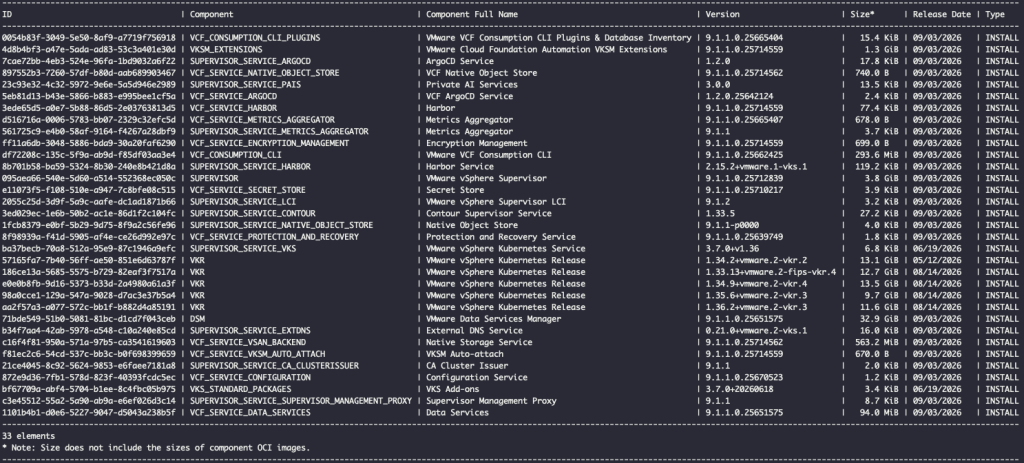
We can also now test this in our browser. Hitting the root of the web server will show an indexed page as shown below.
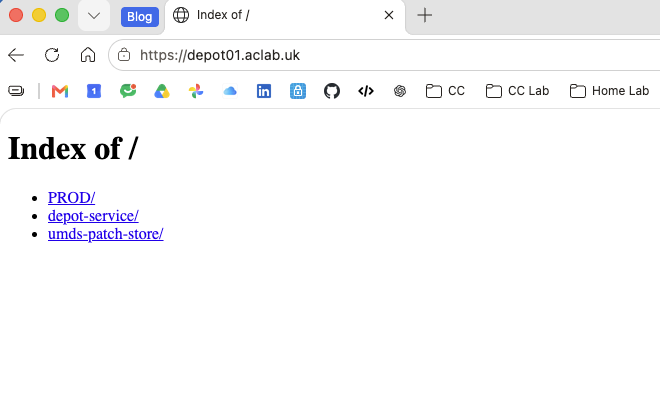
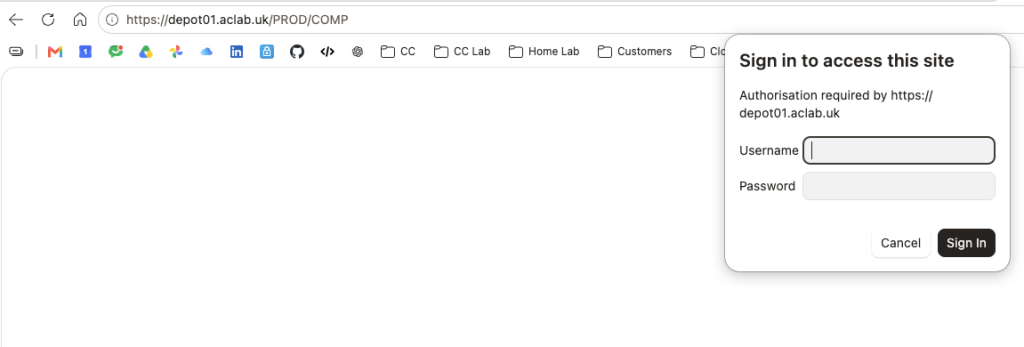
If we go to /PROD/COMP or /PROD/metadata, we should be prompted for a username and password. These are the VCF username and password we configured above with htpasswd.
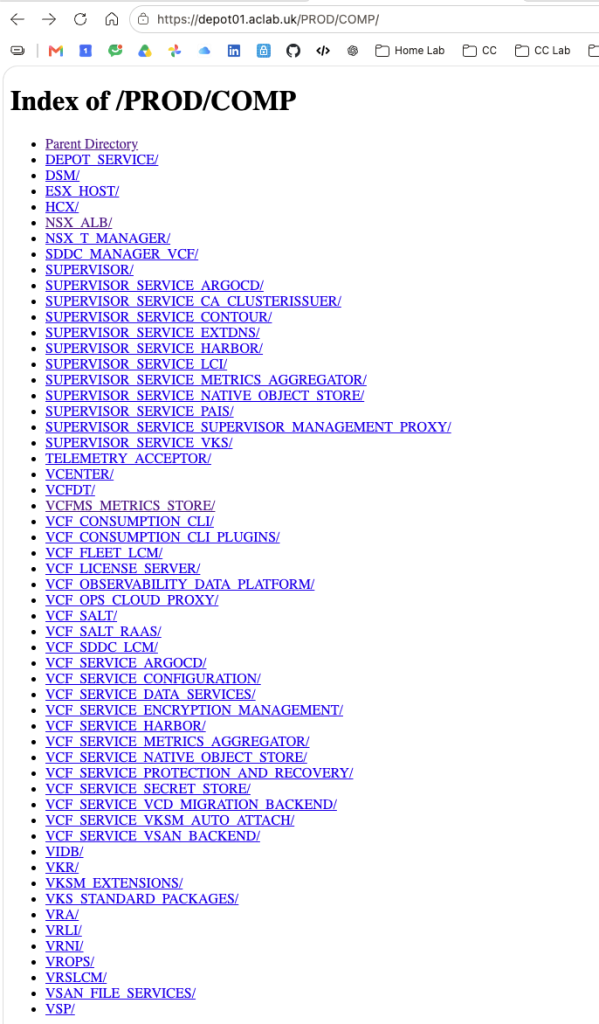
Once we enter the correct credentials, we can see the directory contents. Take note of the additional folders for the downloaded OCI artefacts.
Tidy Up
Over time, as you download and use many versions of VCF, the offline depot store gets quite large. To tidy things up, you can remove unused versions by running the commands below. Note the specific use of the –latest flag to not purge out the latest 9.1.1 releases.
## tidy up all 9.0 install versions
./vcf-download-tool binaries cleanup --sku VCF --vcf-version 9.0 --type INSTALL --depot-store /var/www/html

## tidy up all 9.1 install versions except the latest 9.1.1
./vcf-download-tool binaries cleanup --sku VCF --vcf-version 9.1 --latest=false --type INSTALL --depot-store /var/www/html

## tidy up all 9.0 upgrade versions
./vcf-download-tool binaries cleanup --sku VCF --vcf-version 9.0 --type UPGRADE --depot-store /var/www/html

## tidy up all 9.1 upgrade versions except the latest 9.1.1
./vcf-download-tool binaries cleanup --sku VCF --vcf-version 9.1 --latest=false --type UPGRADE --depot-store /var/www/html
