
VCF 9.1.1 has been released; there are some really interesting updates which are worth shouting about. In this article, I will be re-building my home lab from the ground up for 9.1.1, and will highlight key changes along the way.
Release Highlights
The list below highlights some of the key new features of 9.1.1. I will unpack some of them in more detail later in the article as I complete the new build.
- New compact form-factor deployment that includes a 2-node setup for HA. The documentation states a reduction of up to 40% in memory and CPU.
- VCF download tool can now grab OCI artefacts, which greatly simplifies the process of doing an air-gapped installation of the supervisor and regional harbor registry.
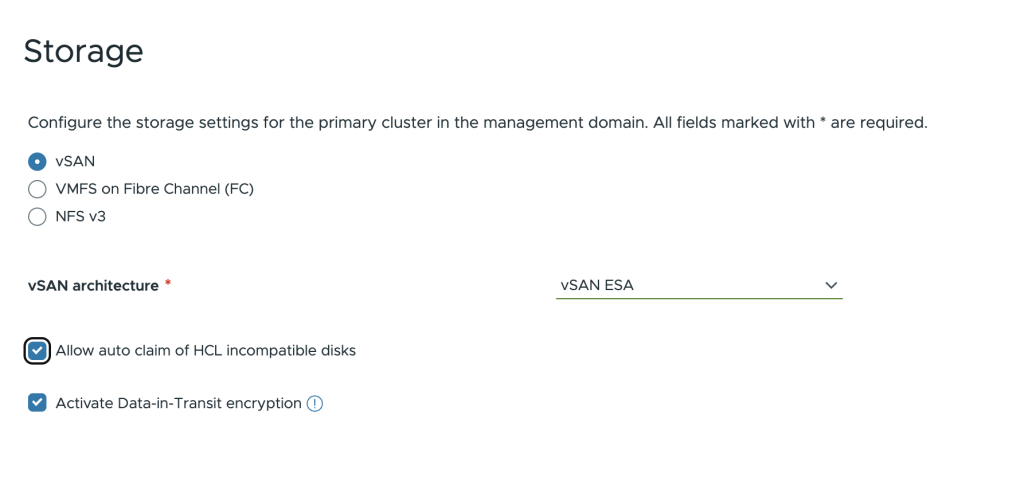
- The configuration overrides for non-HCL vSAN disks are now baked into the installer GUI as an optional tick box. This means that for small lab or POC setups, you do not need to add a line to /etc/vmware/vcf/domainmanager/application-prod.properties.
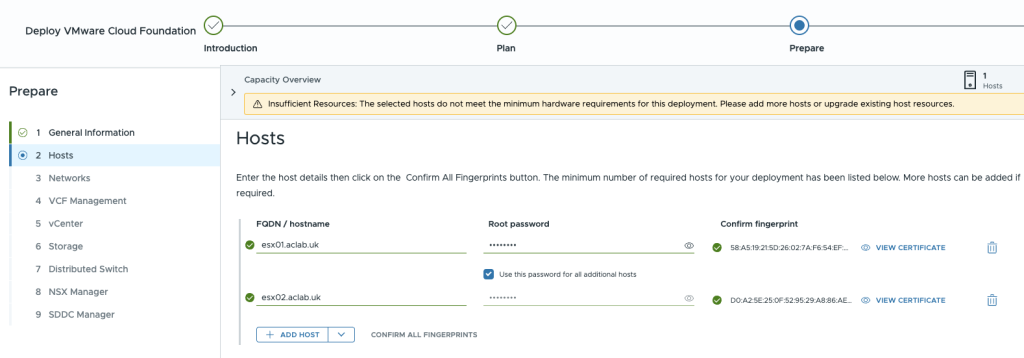
- For fewer than three ESX hosts, the prior override in /home/vcf/feature.properties is fully honoured in the GUI. The required modification is available here.
- The requirements for the VCFMS simple deployment have been slimmed down, you can deploy with one less worker node, saving 12 x vCPU’s and 24GB of memory.
- ArgoCD is now part of VCF services deployed via VCF Automation. This automatically attaches to OIDC VCF-A auth, supports cross-region provider management, enables self-service ArgoCD instance deployments and more.
- VCF native S3 storage is improved upon in vSAN, providing ReadWriteMany storage for containers.
- NSX supports Active/Active for EVPN controllers.
- Distributed VXLAN connectivity supports VCF automation and vSphere Supervisor.
- VLAN-backed VPC connectivity now works without any overlay VTEP network. Useful for those dipping their toes into VPC but not ready for the VTEP-type SDN.
- Full o11y stack for single or multi-cluster VKS environments baked right into VCF Operations.
- Further support for password and certificate management. For example, NSX Edges and Supervisors are now included.
Initial Deployment
I have gone into VCF deployments a number of times; please check out my two-node build and my original one-node build if any of the following is difficult to follow. For the new 9.1.1 build, here are the main steps.
Base ESX Build
For the ESX build, a bootable USB was created using Unetbootin, which helpfully does not format the existing USB stick; instead, it adds the required boot files to the existing partition. Once the process is complete, simply edit the EFI/BOOT/BOOT.CFG file on the USB drive and make kernelopt equal to “kernelopt=ks=usb:/esx01.cfg”. Once done, place the kickstart file from GitHub at the root of the USB drive.

At this point, you can boot the MS-A2 server with the USB key, and the ESX installer will boot and configure itself fairly quickly. Make sure you have connected both SFP+ ports to the MikroTik switch on any of its SFP+ ports.
Offline Depot
I have a Photon OS offline depot from 9.1 that needs updating. I already have a detailed article on how to build this from scratch. Thankfully, the OCI downloads for VKR, Supervisor, etc., are now easily included with some additional commands. This makes life a lot easier!
VCF Installer
We can do a rapid deployment of the VCF installer using ovftool; nothing has changed from the 9.1 OVA, so my prior article still stands here. Due to the changes in VCF installer behaviour around unsupported NVMe and less-than-three-node deployments, I didn’t make any changes that were needed in 9.1.
## review properties within ova file
ovftool VCF-SDDC-Manager-Appliance-9.1.1.0.25713928.ova

## store the ESX password as variable securely
read -s password

## deploy sddc installer
ovftool --name=sddcm01 \
--X:injectOvfEnv --acceptAllEulas --noSSLVerify \
--net:"Network 1"="VM Network" \
-ds=local-esx01 --powerOn -dm=thin \
--prop:ROOT_PASSWORD="$password" \
--prop:LOCAL_USER_PASSWORD="$password" \
--prop:vami.hostname="sddcm01.aclab.uk" \
--prop:guestinfo.ntp="10.166.101.254" \
--prop:vami.ip0.SDDC-Manager="10.166.101.10" \
--prop:vami.netmask0.SDDC-Manager="255.255.255.0" \
--prop:vami.gateway.SDDC-Manager="10.166.101.254" \
--prop:vami.domain.SDDC-Manager="aclab.uk" \
--prop:vami.searchpath.SDDC-Manager="aclab.uk" \
--prop:vami.DNS.SDDC-Manager="10.166.101.254" \
 VCF-SDDC-Manager-Appliance-9.1.1.0.25713928.ova vi://root:$password@esx01.aclab.uk
Certificate Trust
Certificate trust was still required. Below are the minimal steps to trust the certificate added to the offline depot.
## upload lab root certs from my machine
scp RootCA.pem vcf@sddcm01.aclab.uk:/home/vcf
scp Sub01.pem vcf@sddcm01.aclab.uk:/home/vcf

## as per below also add to java key store
## https://knowledge.broadcom.com/external/article/316056/how-to-adddelete-custom-ca-certificates.html
## grab password
export JAVAPASS=$(cat /etc/vmware/vcf/commonsvcs/trusted_certificates.key)

## import roots into java key stores
keytool -importcert -alias rootca -file /home/vcf/RootCA.pem -keystore /etc/vmware/vcf/commonsvcs/trusted_certificates.store --storepass $JAVAPASS
keytool -importcert -alias sub01 -file /home/vcf/Sub01.pem -keystore /etc/vmware/vcf/commonsvcs/trusted_certificates.store --storepass $JAVAPASS

## for this one the password is literally changeit
keytool -importcert -alias rootca -file /home/vcf/RootCA.pem -keystore /etc/alternatives/jre/lib/security/cacerts --storepass 'changeit'
keytool -importcert -alias sub01 -file /home/vcf/Sub01.pem -keystore /etc/alternatives/jre/lib/security/cacerts --storepass 'changeit'
Permit less than three nodes
We still need to add the following to the VCF installer to allow a build with less than three nodes.
echo "feature.vcf.vgl-29121.single.host.domain=true" >> /home/vcf/feature.properties
echo 'y' | /opt/vmware/vcf/operationsmanager/scripts/cli/sddcmanager_restart_services.sh
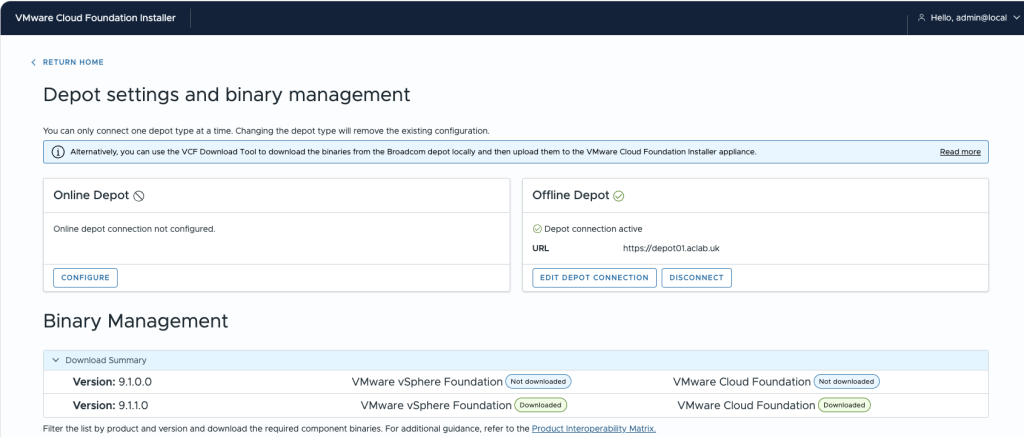
At this point, the VCF installer can be configured with an offline depot URL. Nothing is different here from 9.1. The 9.1 offline depot guide goes into the exact steps if you’re not sure what to do here.
Deploy VCF using JSON
The import of my prior 9.1 JSON was partially successful. I opted to complete the wizard manually. The complete two-node 9.1.1 JSON both with and without VCF-A is available in my Git Repo here.
The following new 9.1.1 options were of notable interest. Size options now do indeed consume less RAM for VCFMS. We are one worker node down and much happier for a small lab.

The network options show the new VLAN-backed VPC. In my case, I will continue with a full stack; MikroTik routers are superb for home labs and permit me to integrate the full VPC SDN with VTEPs and edge BGP, as in an enterprise environment.

Storage nicely allows me to select auto-claiming of non-HCL disks. This is a very welcome addition.
When adding ESX hosts, as long as you have committed the modification to the VCF installer, you can incrementally add nodes, starting from 1. This was previously not possible.
With the installer options reviewed, we can complete the validations and accept the warnings for incompatible vSAN disks and not enough CPU capacity.

If you don’t shutdown the offline depot and unregister it from the ESX host before kicking off the installation, it will be relocated to vSAN during the install. Not a problem per-say but does add time as it’s a pretty hefty virtual machine. You can always re-register it afterwards.
After a few hours the VCF environment completes. I initially installed without VCF-A as performance was a challenge with the single VCF-A K8 node, however this can be retrospectively added from VCF Operations. See the performance notes below when using AMD Ryzen on MS-A2 nodes.

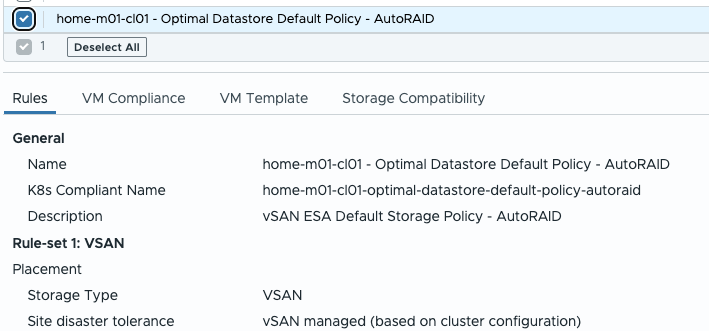
If we login to vCenter we can take a look around, for example the default AutoRAID policy is selected for vSAN.
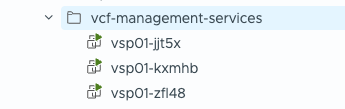
We only have two worker nodes for VCFMS, which saves some compute.
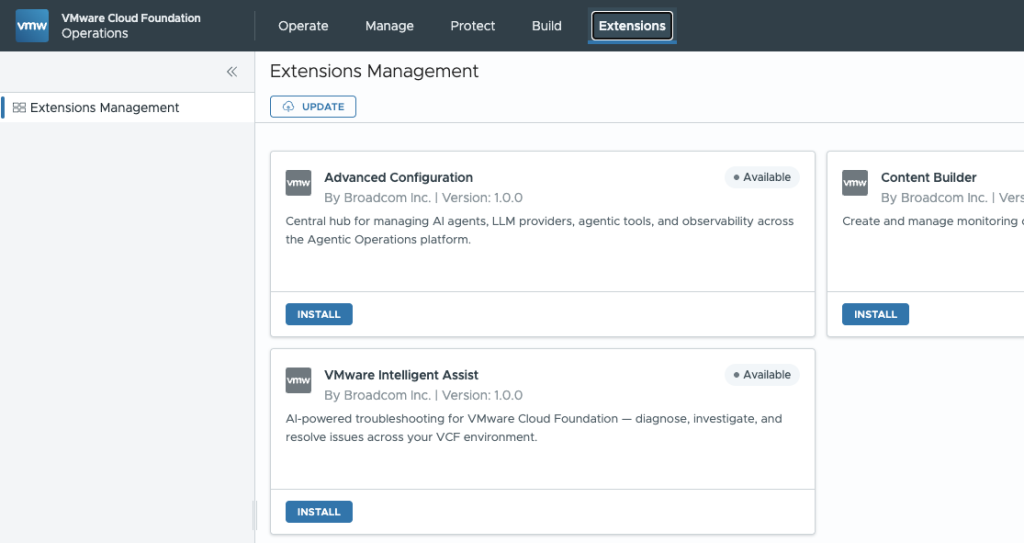
We can see the new extension builder in VCF Operations, including the AI agent integration for configuration and diagnostics.
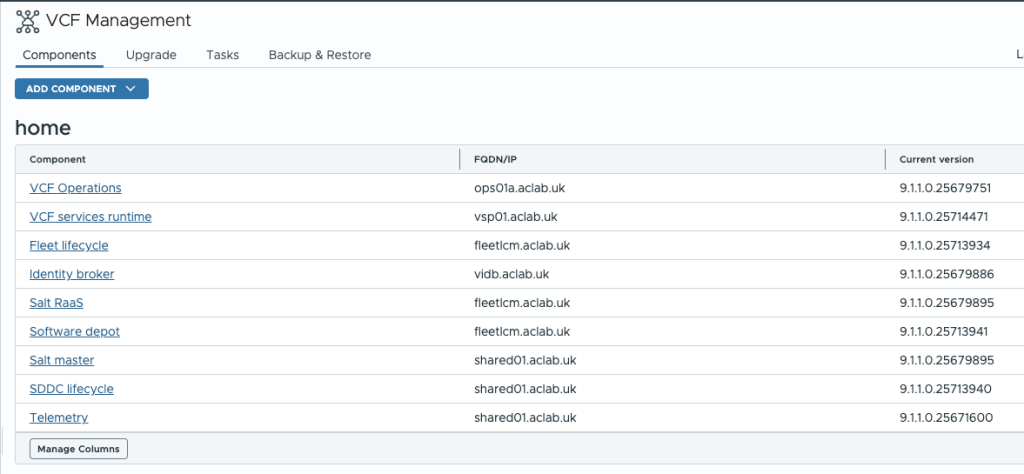
Our versions look as expected.

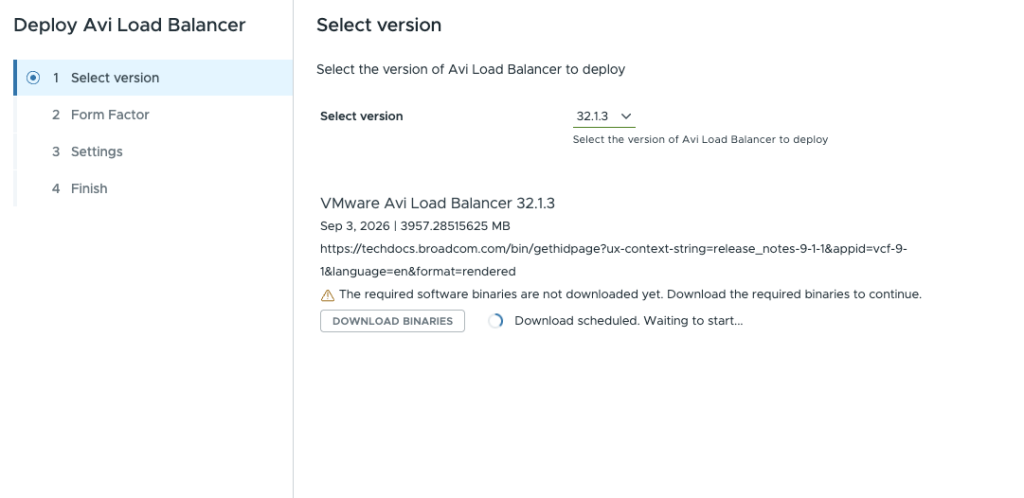
We can download the new 32.1.3 AVI load balancer, prior verisons were pinned to 32.1.1.
Performance Tweaks During Install
To save resources, edit the NSX Manager and remove the memory and CPU reservations. Although this breaks best practices, it helps when running a constrained lab. Also add the advanced parameter below.
## nsx manager advanced parameter
isolation.tools.getEntropy.disable = FALSE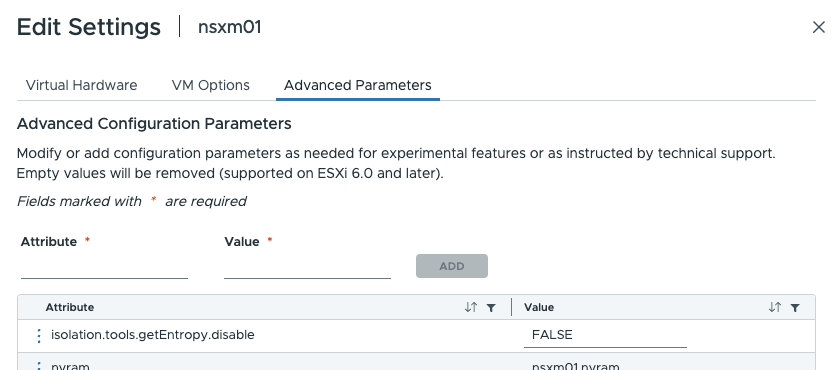
If you find that VCF-A is saturating the CPU, perform the following tasks as soon as the VCF-A node is online. Credit to William Lam and Claude for this one.
## prepare the automation node with your public ssh key so no password is needed for the future
ssh-copy-id vmware-system-user@auto01.aclab.uk

## ssh and sudo to root
ssh vmware-system-user@10.166.101.132
sudo -i

## export kubectl config to the bash profile so it's easier on next login
cat <<EOF >> ~/.bashrc
alias k=kubectl
export KUBECONFIG=/etc/kubernetes/super-admin.conf
EOF
source ~/.bashrc

## remove fips parameter from grub config file
sed -i 's/ fips=1//g' /boot/grub/grub.cfg

## disable fips from k8 deployments
k set env deployment/approval-service-app -n prelude FIPS_MODE=disabled
k set env deployment/catalog-service-app -n prelude FIPS_MODE=disabled
k set env deployment/ebs-app -n prelude FIPS_MODE=disabled
k set env deployment/ccs-infra-eas-app -n prelude FIPS_MODE=disabled
k set env deployment/provisioning-service-app -n prelude FIPS_MODE=disabled

## confirm environmental changes
kubectl get deployment approval-service-app catalog-service-app \
  ebs-app ccs-infra-eas-app provisioning-service-app -n prelude \
  -o jsonpath='{range .items[*]}{"Deployment: "}{.metadata.name}{"\n"}{"FIPS_MODE: "}{.spec.template.spec.containers[*].env[?(@.name=="FIPS_MODE")].value}{"\n\n"}{end}'

## reboot the node
reboot
Next Steps
Now the base deployment is complete, the following next steps need to be carried out to complete the deployment. There are articles on these areas thoughout my blog, however they are based on older versions not 9.1.1. As I build this out, if there are any major changes to the deployment methods, I will create updated articles.
I know for sure that the Supervisor and regional registry will be very different, due to the new OCI artifact download mechanic within the VCF download tool. This new flag should make things much more straightforward.
Additionally, I know that the AVI setup will change, as we can now select the management NIC for the service engines as a VPC network, rather than the prior NSX VLAN or VNI segment.
- Attach and boot my lab AD domain controller
- Setup Identity Broker
- Deploy AVI single node control plane on 32.1.3
- Deploy Supervisor
- Deploy VCF-A All Apps
- Deploy regional harbor registry
- Deploy VKS cluster
