
If you’ve been following along, this is the third part in the “Perfect PKI” series. In this article we will be exploring how we upgrade the Windows operating system which Certificate Services runs on, without doing a complete rebuild. We will retain the database, root certificates and everything but move to a different server.
Four Part Series
This article is part of a four-part series.
- Part #1 – Deploying and Understanding PKI
- Part #2 – How to safely renew root certificates
- Part #3 – How to upgrade the CA Operating Systems
- Part #4 – How to replace an existing PKI hierarchy
Navigation
- Four Part Series
- Introduction
- Migrating to a new server
- Backup Steps
- Removing Roles
- Rebuilding the Roles
- Final Steps
- What’s Next?
Introduction
Technically, this can be achieved by migrating to a new server with a completely different name. However, I tend to think it’s more convenient to re-use the same name. As part of the migration, we will be migrating one of the Subordinate CA servers as an example of how it’s done. Given the lab environment is already running Server 2025, we will just re-use the same OS version. However, the principle applies between OS versions regardless.
The master article from Microsoft about the process is here. I will pick out the relevant steps and explain them from my point of view. At a high level, the end-to-end steps are:
- Rename the existing Virtual Machine object with the suffix “old”. This allows us to create another with the same name.
- Build a brand new Subordinate server and join the domain. I suggest using a temporary name, i.e. subca01-new.
- From the Certificate Services console, take a backup of the private key, certificates as well as the CA database and log files.
- Take screenshots of the certificate templates issued to the SubCA. These need to be manually re-added when the server is rebuilt.
- Take a backup of the registry for the CA service. This includes the AIA, CDP paths etc. Also take a backup of the CAPolicy.inf file. Take note of the current IP information if you plan to deploy the new server in the same network.
- Remove the CA roles from the current server.
- Rename the old server from within Windows with the suffix “old”. Then shut it down.
- Install the CA roles onto the new server, importing the exported private key as part of the installation.
- Import the saved registry keys and reboot the CA service.
- From the Certificate Services console, restore the CA database.
- Publish the CA templates as per the screenshot taken.
The process is fairly quick. If planned and executed well, the current CA roles will only be down for 10 or so minutes. Depending on the organisation you’re working with, the change could take place during business hours. During the migration, renewals and newly issued certificates are not possible.
Given the changes during the uninstallation of the CA role also affects Active Directory, in order to fully back up the current state, we would need to do a backup of AD itself and also the CA server before we make any changes. Rollbacks are very rare. In fact, I have never done one in decades. The backups we take will allow a manual restore to the original server, which, to be fair, is very similar to the migration process anyway – hence it’s never really needed.
Migrating to a new server
Here are the steps in detail.
Firstly, we rename the old server in vSphere and deploy a new one. The new server is joined to the domain with the name subca01-new, was provisioned on a temporary IP address on the same network as the current subordinate.

Backup Steps
From the certificate services console on the original server, take the required backups and copy them to the new server using the below commands.
Backup-CARoleService C:\Temp\CABackup -Password (Read-Host -prompt "Password:" -AsSecureString)
reg export HKEY_LOCAL_MACHINE\SYSTEM\CurrentControlSet\Services\CertSvc\Configuration C:\Temp\CABackup\Certsvc.reg
robocopy C:\Temp\CABackup\ \\subca01-new\c$\Temp\CABackup /E
robocopy C:\Certsrv \\subca01-new\c$\Temp\Certsrv /E
robocopy C:\Certsrv \\subca01-new\c$\Certsrv /E
Copy-Item C:\Windows\CAPolicy.inf \\subca01-new\c$\Windows\CAPolicy.inf
Take a screenshot of the CA templates which are published on this particular CA.

Removing Roles
Remove the CA roles from the current Subordinate server. In this lab the server also uses DFS-R to replicate C:\Certsrv, so those roles will also be removed. In order to remove the main certificate services role, you must first remove the web enrollment role first.
Remove-WindowsFeature ADCS-Web-Enrollment
Get-DfsrConnection | Remove-DfsrConnection
Get-DfsReplicatedFolder | Remove-DfsReplicatedFolder
Get-DfsReplicationGroup | Remove-DfsReplicationGroup
Restart-Service DFSR
Remove-WindowsFeature AD-Certificate,RSAT-ADCS-Mgmt,Web-Mgmt-Console,FS-DFS-Replication,RSAT-File-Services,RSAT-DFS-Mgmt-Con
Rename-Computer -NewName SubCA01-Old
shutdown -t 0
Rebuilding the Roles
Rename the newly built server and install the required roles. Also change its IP address to the same as the previous server.
Rename-Computer -NewName SubCA01
shutdown -r -t 0
New-NetIPAddress -InterfaceAlias Ethernet0 -IPAddress 10.166.108.18 -PrefixLength 28
Remove-NetIPAddress -InterfaceAlias Ethernet0 -IPAddress 10.166.108.19 -PrefixLength 28
New-Item -ItemType Directory -Path C:\Certsrv
Install-WindowsFeature AD-Certificate,RSAT-ADCS-Mgmt,ADCS-Web-Enrollment,Web-Mgmt-Console,FS-DFS-Replication,RSAT-File-Services,RSAT-DFS-Mgmt-Con
Reconfigure DFS-R for the AIA/CDP path and wait a minute or two for the initialisation to complete.
## Remove the staging, caching, conflict folder path on subca02
rm \\subca02\c$\Certsrv\DfsrPrivate
## Setup DFS-R
New-DfsReplicationGroup -GroupName Certsrv | New-DfsReplicatedFolder -FolderName C:\Certsrv | Add-DfsrMember -ComputerName "SubCA01","SubCA02"
Add-DfsrConnection -GroupName Certsrv -SourceComputerName SubCA01 -DestinationComputerName SubCA02
Set-DfsrMembership -GroupName Certsrv -FolderName c:\Certsrv -ContentPath C:\Certsrv -ComputerName SubCA01 -PrimaryMember $True -StagingPathQuotaInMB 4096 -Force
Set-DfsrMembership -GroupName Certsrv -FolderName c:\Certsrv -ContentPath C:\Certsrv -ComputerName SubCA02 -StagingPathQuotaInMB 4096 -Force
Update-DfsrConfigurationFromAD –ComputerName SubCA01,SubCA02
## Check logs
Get-WinEvent "DFS Replication" -MaxEvents 3 | fl
## Create a test folder on both servers and ensure it's replicated properly
New-Item C:\Certsrv\testing_replication_subca01 -ItemType Directory
New-Item \\subca02\c$\Certsrv\testing_replication_subca02 -ItemType Directory
## Tidy up
Remove-Item C:\Certsrv\testing_replication_subca01
Remove-Item \\subca02\c$\Certsrv\testing_replication_subca02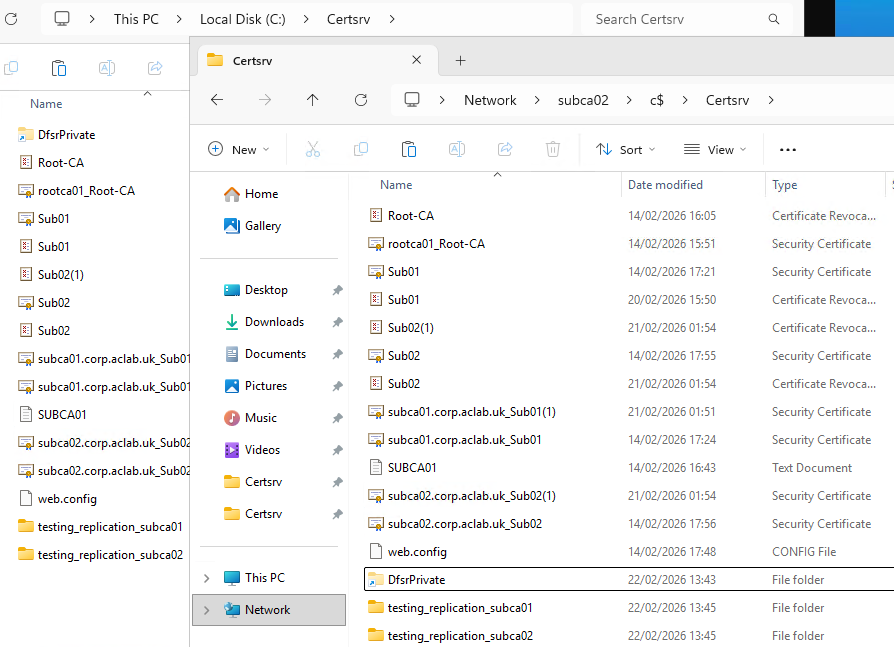
Configure the certificate services role, ensuring we import the existing private and public key. From server manager complete the role configuration.

Click next.

Tick box roles and click next.

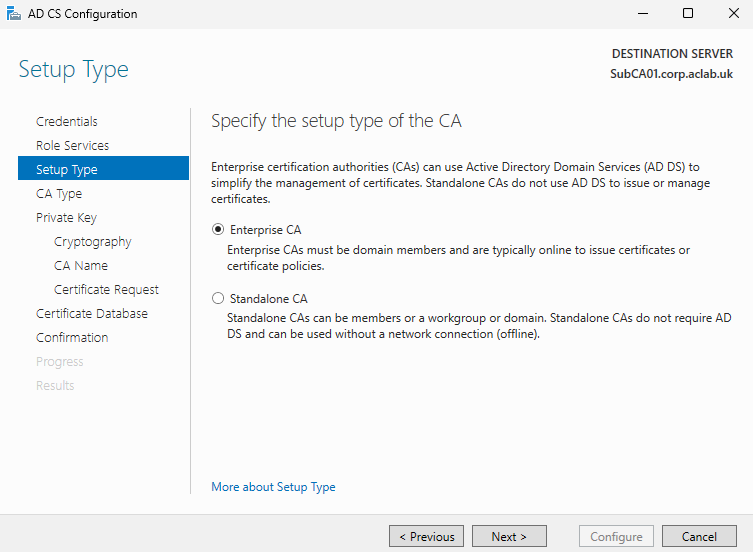
Select Enterprise CA.
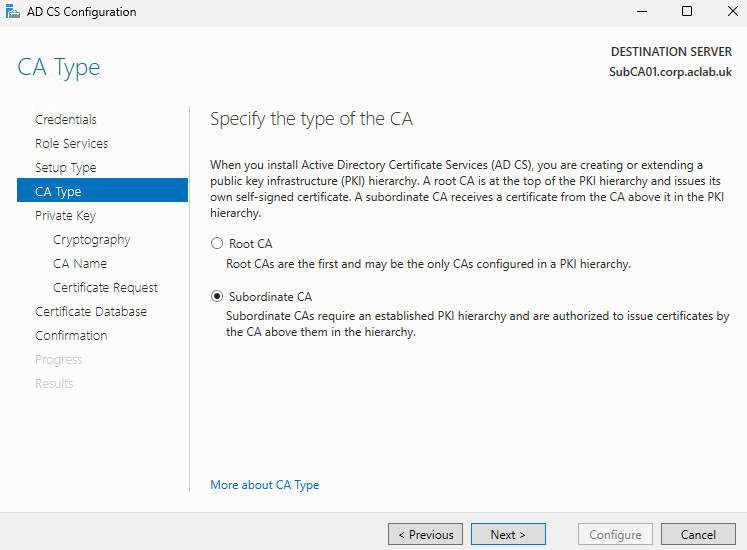
Select Subordinate.
Select use an existing private key and select a certificate and use its associated private key.

Click the import button

Browse to the CABackup folder we replicated over and select the Sub01 key file.

Enter the password that was used when performing the export.

Click next, leave the allow administrator interaction tickbox unchecked. You normally tick this when you have Hardware Security Module (HSM) appliances in the environment which need to leverage the private key.

Leave the paths default, click next.

Review the confirmation screen and complete the wizard.

We now need to update IIS to use the DFS-R replicated CDP path.
ipmo WebAdministration
Set-ItemProperty "IIS:\Sites\Default Web Site\CertEnroll" -name physicalPath C:\Certsrv
Get-ItemProperty "IIS:\Sites\Default Web Site\CertEnroll" -name physicalPath
Import the registry backup we made from the original server.
reg import C:\Temp\CABackup\Certsvc.reg
Restart-Service CertSvc
Restore the CA database from the backup.
Restore-CARoleService C:\Temp\CABackup -Force -Password (Read-Host -prompt "Password:" -AsSecureString)
Restart-Service CertSvc
Final Steps
Before publishing the prior CA templates, perform a quick health check with pkiview.msc.

Also check the database looks ok, simply look for issued certificates.

Finally publish the same CA templates that were there before as per the screenshot taken in the beginning.
This concludes the process, we have now migrated the complete certificate authority, its private key, database and registry settings over to a brand new server. Last but not least, we can decommission or simply delete the subca01-old server.
What’s Next?
This concludes this particular article. I hope it was helpful to make PKI a bit more graspable. At some point I will write other articles on common scenarios which challenge organisations, for example:
- Our PKI is badly broken, we want a new one. How do we migrate to a greenfield deployment and retain service in our environment?